Friday, September 13, 2019
Part-5: Test Failover
Part-1: Prism Central One-Click Deployment (Click Here)
Part-2: Enabling Leap and Configure Availability Zones (Click Here)
Part-3: Create and Configure Protection Policies (Click Here)
Part-4: Create and Configure Recovery Plans (Click Here)
In this post we will go through Test the Recovery Plans by conducting Test Failover,
After Validation completed, lets do a Test Failover to make sure all are good, same like Validation, select your recovery plan, click on Actions and then click on "Test"
Thursday, September 12, 2019
Part-4: Create and Configure Recovery Plans
Part-1: Prism Central One-Click Deployment (Click Here)
Part-2: Enabling Leap and Configure Availability Zones (Click Here)
Part-3: Create and Configure Protection Policies (Click Here)
In this post we will go through Creating, Configuring and Validating Recovery Plans,
From Prism Central on the Main Site, on the left corner, click on Entities menu > Policies > Recovery Plans
Part-3: Create Protection Policies
Part-1: Prism Central One-Click Deployment (Click Here)
Part-2: Enabling Leap and Configure Availability Zones (Click Here)
In this post we will go through Creating and configuring Protection Policies,
From Prism Central on the Main Site, on the left corner, click on Entities menu > Policies > Protection Policies
Part-2: Enabling Leap and Configure Availability Zones
Part-1: Prism Central One-Click Deployment (Click Here)
Before you start you need to make sure that your network connectivity between both sites is healthy and both sites are reachable from the other site,
Now Let's start our journey with Nutanix Leap ...
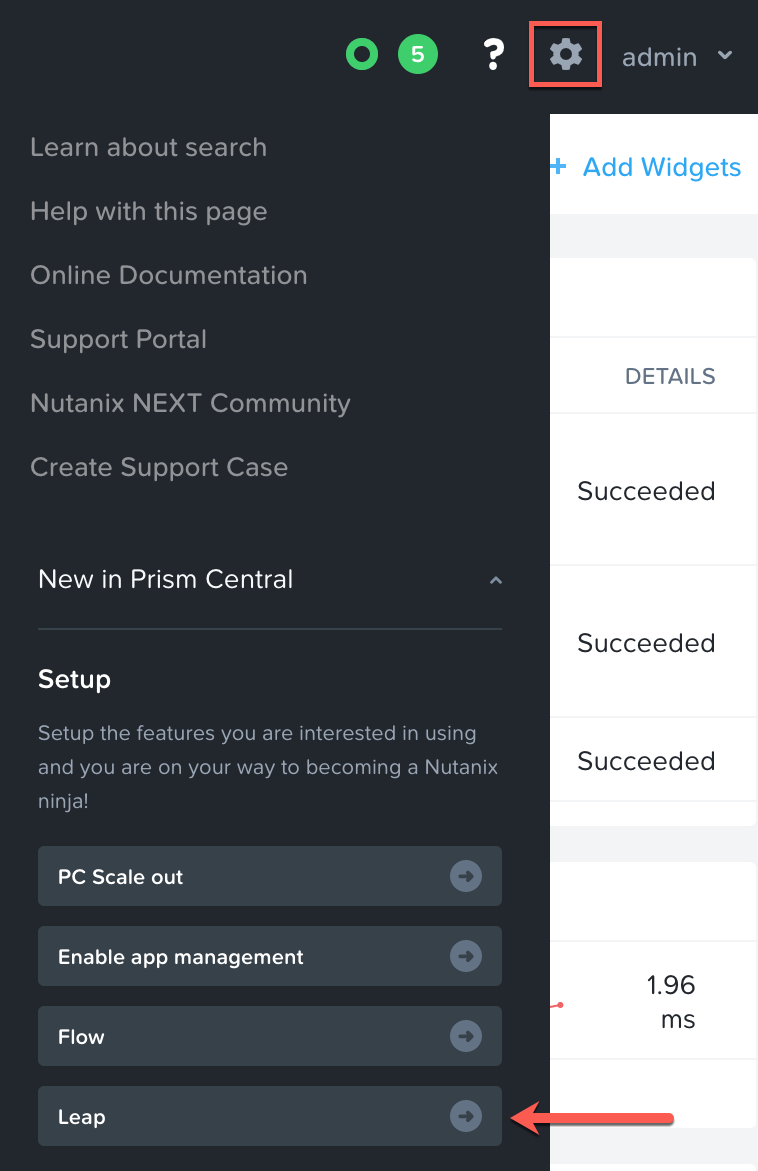
From Prism Central "PC" in Main site and the same steps from DR Site, From Settings menu, under Setup, Click on "Leap"
Part-1: Prism Central One-Click Deployment
From Prism Element main page on the upper left side look for Prism Central, click on "Register or Create new"
DR Orchestration (On-Prem Leap)
Before you start you need to make sure that your network connectivity between both sites is healthy and both sites are reachable from the other site,
My Lab consist of two Nutanix Clusters (Main Site) and (DR Site), on each site we will deploy Prism Central which will be integrated together to provide single logical management layer for our Leap DR services,
Monday, July 29, 2019
Why Disaster Recovery matter!
What is "RTO and RPO" and why it is matter?
Nutanix Metro Availability (Synchronous Replication)
In another word, when any data write happen in main site another copy is sent to DR and wait for DR confirm that the data is written in DR before committing the data in main site, that will make the RPO equal to "0", it is required that the round trip latency between both sites to be equal to or less than "5 ms" Maintain adequate bandwidth to accommodate peak writes. It is also recommended that you have a redundant physical network between both sites.
Before you start you need to make sure that your network connectivity between both sites is healthy and both sites are reachable from the other site, and your RTT Latency is within 5MS
When using the Nutanix Metro Availability over VMware ESXI or Microsoft Hyper-V (Nutanix AHV coming soon), Nutanix will handle stretching and the replication of the storage between Main and DR sites,
Nutanix Near Synchronous (Near-sync DR)
NearSync DR provides the best of both worlds (Sync and Async), zero impact to primary I/O latency (like async replication) in addition to a very low RPO (like sync replication (metro). This allows users have a very low RPO without having the overhead of requiring synchronous replication for writes.
Nutanix Cross Hypervisor DR
Now let's go to step by step to build your cross-hypervisor DR scenario, before you start you need to make sure that your network connectivity between both sites is healthy and both sites are reachable from the other site,
From Main site Prism interface click on the main tab and go to Data Protection and click on it
Nutanix Async DR - Basic setup and Protection Domain Configuration
Nutanix Async DR - Recover from a Disaster
Async DR - Basic setup and Protection Domain Configuration (Click Here)
In this post we will go through the steps of Recover from a Disaster for protected VM's from Main site to DR site,
In this scenario we assume that we lost the Main site (No access to Main Site anymore) and we need to recover from the DR site,
From DR Site go to Data Protection page, select the protection domain you need to recover and select "Activate"
Nutanix Async DR - Planned Failover
Async DR - Basic setup and Protection Domain Configuration (Click Here)
In this post we will go through the steps of a planned migration for protected VM's from Main site to DR site,
As first step we need to double check that every thing looks normal in DR site, go to Data Protection page to make sure that the protection domain is listed, you will find the protection domain but not as active and if you check the VM page you will not find the VM's as it is currently running in the main site.
Nutanix Async DR - Cloning VM from Snapshot to DR Site
Async DR - Basic setup and Protection Domain Configuration (Click Here)
In this post we will go through the steps of Cloning protected VM to DR site,
In this scenario we have normal access to Main site and the original VM is working with no issues but we need to clone another copy for the same VM from the DR site.
From the DR Site go to Data Protection page and select the protection domain from the list, once selected you will be able to select "Local Snapshot", select the version you want to restore (Clone) your VM from, for example if you set your replication schedule every 1 hour with retention of 10 last copies then you will find here 10 versions from the last 10 hours,
Select your snapshot and click on "Restore"!
Tuesday, November 15, 2016
Adding New Disk to Linux VM running on Nutanix AHV (Part-2: Creating new Volume group and new Logical Volume)
Sunday, November 13, 2016
Adding New Disk to Linux VM running on Nutanix AHV (Part-1: Extending Current Volume group and Logical Volume)
Thursday, September 22, 2016
Invisible Infrastructure: In-Place Hypervisor Conversion
Monday, November 16, 2015
VMware vRealize Operations Manager Step by Step (Part-5) Creating vRops Email Notifications
Configure an optional SMTP server to activate email service for reports and for notification messages when a problem occurs. Administrative alerts occur when vCenter Operations Manager detects a problem with one or more of its components and cannot collect data from the monitored objects.
To configure the Email Notification first we should have access to the vRops admin Portal, from the main menu click on Content,
Wednesday, October 28, 2015
VMware vRealize Operations Manager Step by Step (Part-4) Policy Configurations (Allocation Or Demand?)
Out of the box, the Default Policy in vRealize Operations is set to use an Allocation Capacity planning model for most Object types.
In many other circumstances, a better starting point would be to apply a Demand based policy for most Object types and resource dimensions.
We will go through how to make this changes and what difference they will make to the Capacity Planning Analysis results.
Allocation:
Uses simple mathematics to do capacity planning. Works only on containers & Datastores Reduces the CPU, VM or DISK SPACE allocated to a VM from the total available. The total available can be hypothetically increased by using Over commitment Ratios
CPU Demand: Amount of CPU resources an object would have used if there was no contention Demand (Mhz) for CPU comes from vCenter Metrics. Derived as Percentage by vROps Demand can be Greater than , Equal to or Less than Usage
Memory Demand: Derived by vROps by using Active Memory + Overheads
Network Demand: Derived by vROps using network usage per vNic as a percentage of the bandwidth.
Disk Demand: Sum of the queued IO commands and the outstanding IO commands as a percentage of the overall capacity. It is derived by vROps.